If you love seafood and are down for some adventure in Washington, let me suggest clamming.
Besides the incredible hiking trail system, seafood is definitely abundant in the Pacific Northwest. I was first introduced to recreational seafood harvesting from family friends who have lived here for a long time and some own boats and go catch their seafood all the time.
However, let me tell you that you don’t have to be a pro to go clamming. There are rules and things you’d need to prepare for before heading outside and harvest/forage your seafood, so I hope this blog post is helpful.
The Ultimate Guide to Clamming in Washington
The best resource I’d always recommend you to go to first when it comes to updated and current information is the Washington Department of Fish and Wildlife website, HERE. That will include more information for fish, crab, shrimp, crab, and more.
- Know clam, mussel, and oyster harvesting seasons
- Know how to read Tide Chart *it’s important!
- Get your shellfish permits
- Pick up sone necessary tools for clamming
- Know clam types
- Legal sizes and daily limits
- My favorite spots for razor clamming, oysters, and other clam varieties & how to get there
- What to wear clamming
- Clam cleaning, preserving, & my favorite ways to eat them
- Recap with tips!

1. Know clam, mussel, and oyster harvesting seasons
Clam, mussel, and oyster harvesting seasons vary by beach.
When you find the beach with the type of clams that you like (if they’re in season, of course!), you’d need to pay attention to current water quality information at that beach as well as any health advisories like biotoxins, pollution, or other human health concerns the same day you plan to harvest.
LIST OF BEACHES & CLAM, OYSTER, MUSSEL SEASONS: 2021 Public Beach List – Special Rules
SHELLFISH SAFETY INFORMATION: AN INTERACTIVE MAP
FOR RAZOR CLAM BEACHES, go HERE. Make sure to read on how razor clam seasons are set when you’re there.
2. Know how to read Tide Chart
TIDE CHART: 2021 Seattle Daylight Low Tides – Puget Sound Bivalves
Since I live in Seattle, I’m flexible and can decide to go whenever I want when clams are in season. Get in touch with someone you know in Washington who has gone clamming before or really just plan ahead.
My most recent clam dig was on a Wednesday, March 15, 2021, and according to the tide chart (linked above), low tide was at 1427 (2:27 pm) at 1.4 ft. And 1.4 ft is within the suggested marginal clam and oyster tide (-0.4 – 1.5). Ideally, good clam and the oyster tide are between -0.5 and lower.
Best tips:
-
Plan your arrival at least an hour before the predicted low tide
-
Of course, avoid going when it says ‘no daylight low‘
-
To avoid crowds, opt for a weekday
3. Get your shellfish permits
Discover Pass:
It’s required for the vehicle to access state parks and recreational lands managed by Washington State Parks and Recreation Commission, the Washington Department of Fish and Wildlife (WDFW), and the Washington State Department of Natural Resources (DNR).
-
Annual pass: $30
-
One-day pass: $10
I have the annual one and have used it many times as it works for some hikes located in state parks in Washington.
Shellfish License
(valid for a year), and it’s cheaper for Washington residents. You can get them at Big 5.
-
Resident (Aged 16-69): $17.40 annual
-
Non-resident: $36.10
It’s cheaper for seniors, please check for types of fees, HERE.
Ferry fares & fees
Vary by route depending on:
-
Geographical location
-
Sailing time
-
Age of customer
-
Customer disabilities
-
Size of vehicle
If you know the departing terminal and arriving terminal, check fares HERE.
Lastly, pack some snacks and be ready to go on a drive.
4. Pick up some necessary tools for clamming
The rule is that clams can be dug by hand or hand-operated fork, pick, rake, or shovel. Digging equipment can be shared, but you must have your own bag or container for your own daily limit in case a ranger wants to check.
Clams:
-
Gloves (I use my rubber and bamboo garden gloves bought from a local nursery, but you can use any finger gloves to help protect your hands from broken clam shells while digging)
-
Small shovel or long-handled one to dig up the sand and refill clam holes
-
Hand-operated fork aka cultivator
-
Plastic Crab Gauge & Clam Measure (I bought mine at Big 5)
-
A bucket or container of some sort

Oysters:
-
Oyster shuckers
-
Food Grade, high-performance gloves
-
Bring a cooler with some ice, a few cans of beers, a kitchen towel, a gallon of water (sink water is fine, and it’s to quickly rinse the oysters from sands and sediments), lime, and Tabasco if you want to enjoy your oysters fresh at the beach. Oysters eaten at the beach do count toward your daily limit.
-
Shells must be left at the beach, so bring a zip-lock bag if you want to bring some oysters home. My friends love oysters in congee. I don’t, so I just enjoy them fresh at the beach.
Razor clams:
-
A razor clam gun (can be DIYed from an acrylic pipe or store-bought)
-
A net bag that you can wear around your waist belt (this is mostly helpful for razor clamming)
Lastly, remember that broken shelled clams do count toward your daily limit. To reduce clam mortality, push any undersized clams into the refilled hole.
5. Know clam types
Clams, mussels, and oysters are also known as bivalve shellfish. They are filter feeders, and that means they ‘feed by straining suspended matter and food particles from water, typically by passing the water over a specialized filtering structure.’ Information in this section is taken from the Washington State Department of Health, for picture IDs and more information, please read HERE or from Washington Department of Fish and Wildlife HERE.
My personal favorites are small clams that I can steam or make clam pasta with. Larger ones are also good to steam and grill/bake but they require an extra cleaning step. Below are common marine clam types.
- Manila Littleneck Clam: up to 2.5 in, oblong (similar to Native Littlenecks but more oval), grey, brown, or mottled. Depth (how deep you’d have to dig): 2-4 in.
- Native Littleneck Clam: up to 3.5 in, similar to Manila Clams but more round, cream, grey, brown, or mottled. Depth: 6-10 in.
- Varnish Clam: up to 3 in, oval, flat, shiny brown coating and purple inside shell. Depth: 1-2 in. *Warning! Varnish clams retain marine biotoxins longer and at higher levels than other clams because they are bi-modal feeders (filter feed and bottom feed).
- Macoma Clam: up to 4 in, oval to square to somewhar triangular, wafer thing, chalky white shell and slightly bent at the siphon end. Depth: 4-6 in.
- Butter Clam: up to 5 in, heavy, oval to square, yellow to grey/white-colored. Depth: 12-18 in. *Warning! Butter clams retain marine biotoxins longer than other clams.
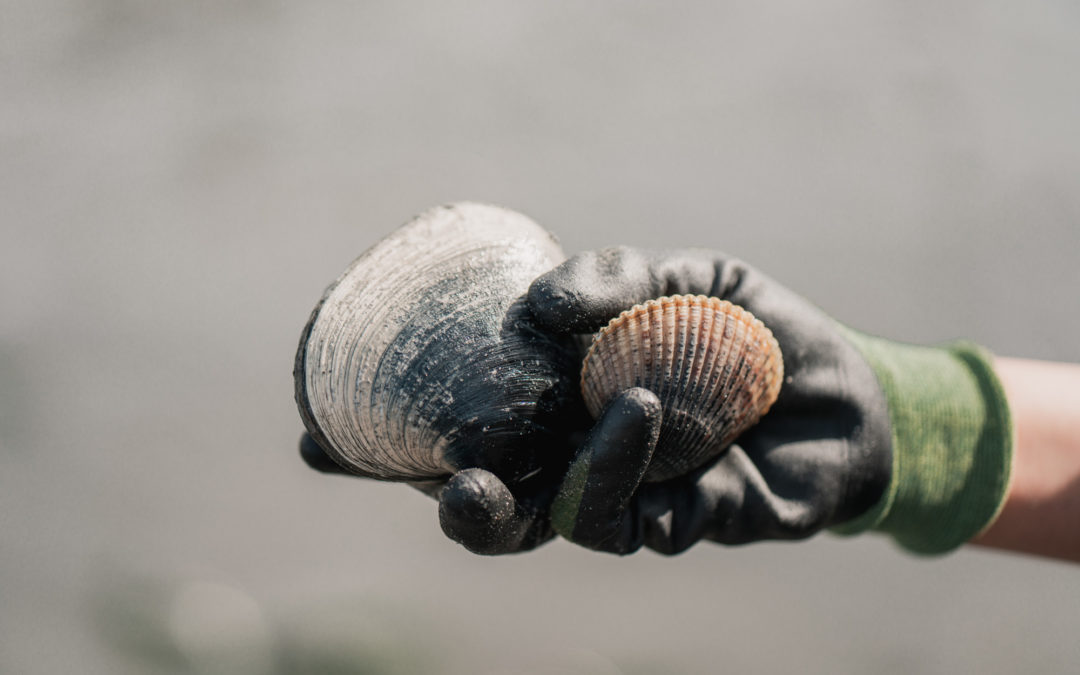
- Cockle Clam: up to 5 in, round and somewaht triangular (pointed hinge), very distinctive with prominent ridges radiating/fanning out from the hinge, mottled, light brown colored. Depth: 1-2 in.
- Horse Clam: up to 8 in, oval, chalky white with yellow/brown patches of skin on shell. Siphon has leather-like flap on the tip and sometime cannot be pulled into shell completely. Depth: 1-2 ft. *You’d need a shovel for this!
- Eastern Softshell Clam: up to 6 in, oval to square, brittle and thin shell, irregular surfacce and uneven concentric ring, chalky white to gray with brown/yellow skin on the edge. Siphon doesn’t have leathery tip like Horse Clam. Depth: 8-18 in.
- Geoduck: shell up to 10 in, 2.5 lbs – 10 lbs, oblong, gaping oblong shell with concentric rings, white shell with flaky brown skin. Siphon and mantle are large and long. Depth: 2-3 ft.
- Razor Clam: up to 6 in, oblong, gaping oblong shell with concentric rings, brown shell. Siphon is large and long. Depth: 6 in and more and they typically move downward when dug. *You’d need a razor clam gun for this!
Mussels: Blue mussels are up to 3 in, and California mussels are up to 6 in. Oblong, blue-black or brown shell. They attach to rocks, gravels, boats and other hard surfaces.
Oysters: up to a foot long, oblong with irregular wavy edges, chaly white or gray. Grown in clusters
Freshwater clams and mussels: There are no water quality standards, unlike the above marine counterparts. Because they live near sources of contamination. They can contain toxins, chemicals, harmful bacteria, and viruses, hence, they are NOT SAFE TO EAT! The Department of Fish and Wildlife prohibits the harvest of freshwater clams and mussels from all Washington freshwater sources.
6. Legal sizes and daily limits
Daily limit of all clams: no more than 40 clams (not to exceed 10 lbs) except geoducks, horse clams, and razor clams. Each person’s limit must be in a separate container.
Shellfish/Seaweed Species Rules
-
Native, Littlenecks, Manilas, Butters, Cockles: min size 1 1/2 in
-
Eastern softshells, varnish, & all other marine clams: no min size
Geoducks: no min size, daily limit: first 3 dug.
-
It is unlawful to thrust any instrument through the neck of a geoduck.
-
It is unlawful to possess only the neck of a geoduck.
-
Geoduck cylinder max diameter is 24″ and must be non-mechanized and hand-operated.
Horse Clams: no min size, daily limit: first 7 dug (regardless of size or condition, broken clams count towards limit)
Razor Clams (coastal beaches): no min size. Daily limit first 15 dug (regardless of size or condition, broken clams count towards limit)
7. Best spots for clams and oysters – How to get there!
If you know a beach name, county, marine area, you can use the Find beaches feature on the WDFW HERE. It is confusing though!
REMINDER: Always check for current beach closures and health advisories the same day you plan to harvest.
Oysters and clams (specifically manila and littleneck clams):
The best beach that I have been to that has always had an abundance of oysters and clams (specifically manila and littleneck clams) is at Dosewallips State Park in Brinnon, WA. There are other activities and features, but I only go here for oysters and those clams.
HOW TO GET THERE: From Seattle, there are 2 ways depending on if you’d want to drive all the way or drive and take the ferry. Keep in mind you’d have to pay for the cost of the ferry there and back. Simply plug Dosewallips State Park and follow GPS on your phone to get there.
Parking lot GPS: 47.690601, -122.896430. From there, just follow the sign to the oyster and clam beach. It’s a popular place, and there will most likely be a ranger checking your daily limit.
Good variety of clams including geoducks, horse clams, and oysters:
-
Port Gamble Forest Heritage Park: Parking for about 12 cars (Parking lot GPS: 47.839373, -122.586775) and there’s a short trail to the beach.
-
Termination Point at Shine Tidelands State Park (right under the Hood Canal bridge)
-
Wolfe Property State Park is my personal favorite (Parking lot GPS: 47.881896, -122.631151)
HOW TO GET THERE: From Seattle, you can drive all the way from I5-South and follow GPS directions or take ferries to cut down driving time. Both of the Seattle – Bainbridge Ferry to Bainbridge Island or Edmonds – Kingston Ferry to Kingston will yield about the same travel time.
Razor Clam Beaches:
The Washington Department of Fish and Wildlife (WDFW) divides the harvest areas into 5 major management zones: Long Beach, Twin Harbors, Copalis Beach, Mocrocks, and Kalaloch. Map HERE.
My favorite beach that I have come back to at least 3 times is Twin Harbors in Grayland, north of Long Beach on the Washington coast. You’d need a high clearance car in order to drive safely on sand and be sure to check for domoic acid levels before heading out.
HOW TO GET THERE: Simply plug Twin Harbors Beaches to your GPS, and the drive here takes about 2.5 hours from Seattle.
8. What to Wear Clamming
I find that the most important thing before you head out to do anything outdoors is to look out for weather conditions. Weather in Washington, especially in the fall, winter, and spring season is especially unpredicted. Know that rain usually is not as heavy, and clouds change very rapidly.
For clamming, I usually dress like how I’d dress when hiking. On top, I like a comfortable sports bra layered underneath a long-sleeved top and a light rain jacket or windbreaker. Leggings are usually my bottom of choice. Don’t forget that it’s muddy and you’d mostly get all wet and sandy, so opt for a pair of mid-height or knee-high rain boots with comfortable socks.
To keep your hair away from your face, I usually wear a hat like a dad hat or a bucket one. It also is to keep the sun out of my face. Remember sunscreen on your face and neck as well!
Lastly, you don’t have to wear too many layers if it’s a slightly windy but nice day. You’ll be sweating left and right after like 10 minutes of digging.
OUTFIT (worn in this post): bra: GIRLFRIEND COLLECTIVE | long-sleeved sweater: RALPH LAUREN *thrifted | leggings: LULULEMON | hat: FJALLRAVEN | sandals: KEEN *gifted| knee-high rain boots: CHOOKA *gifted


9. How to Clean, Store, and Cook Your Clams
Clean:
I always try to clean the clams with salt water at the beach. If you have some ice around, you can chill your freshly caught clams in the cooler.
When I get home, I always soak all of my clams in fresh water for at least half an hour. I’d rinse and wash to the best of my ability to make sure there’s not a lot of sand left. I always try to cook them the day of for dinner and lunch the next day.
For geoduck (video HERE) and razor clams (video HERE), the cleaning and preparation do take some time, and you’d typically want to leave out the stomach. The siphons are great when lightly blanched.
Store:
The best tip is to let them sit in a colander one next to another on a plate with some wet kitchen towel on top. They should stay fresh for a few days in the fridge.
Cook:
For Native and Littleneck clams, I especially love to make clam pasta (with shells on) although they can be quite sandy after a million times washing. But geoduck, cockles, and razor clams, I think they’re better when all of the stomach parts are removed.
I usually don’t eat the broken shelled clams. My favorite ways to eat clams is to simply steam or boil them in some beer and chopped up lemongrass, ginger, and Thai chilies. I also love to grill/bake them with some oil spring onion and eat with toasted crushed peanuts and Vietnamese coriander (videos for reference HERE).
I love to mix some salt and pepper with fresh squeezes of lime juice, and that makes a great dipping sauce for steamed clams. I also make some ginger fish sauce, but the salt pepper lime is always a crowd’s favorite!
10. Let’s recap:
- KNOW YOUR DAILY LIMITS!
- CLAMS LEAVE SIGNS: LOOK FOR HOLES OR DIMPLES AKA ‘CLAM SHOWS’
- BROKEN SHELLED CLAMS DO COUNT TOWARD YOUR DAILY LIMIT
- FILL ALL HOLES!
- SHUCK ALL OYSTERS AND LEAVE SHELLS ON THE BEACH WHERE YOU FOUND THEM!
- DIGGING ON CLOSED BEACHES COULD RESULT IN A FINE.
Lastly, I hope you find this blog post helpful, and this inspires you to go out and play. Let me know if you have any questions, and check my Clamming stories on Instagram. Remember that it’s all about the journey, and all of this preparation and traveling plus the effort of getting there are fun on their own rights. Stay safe out there and have fun if you go.

