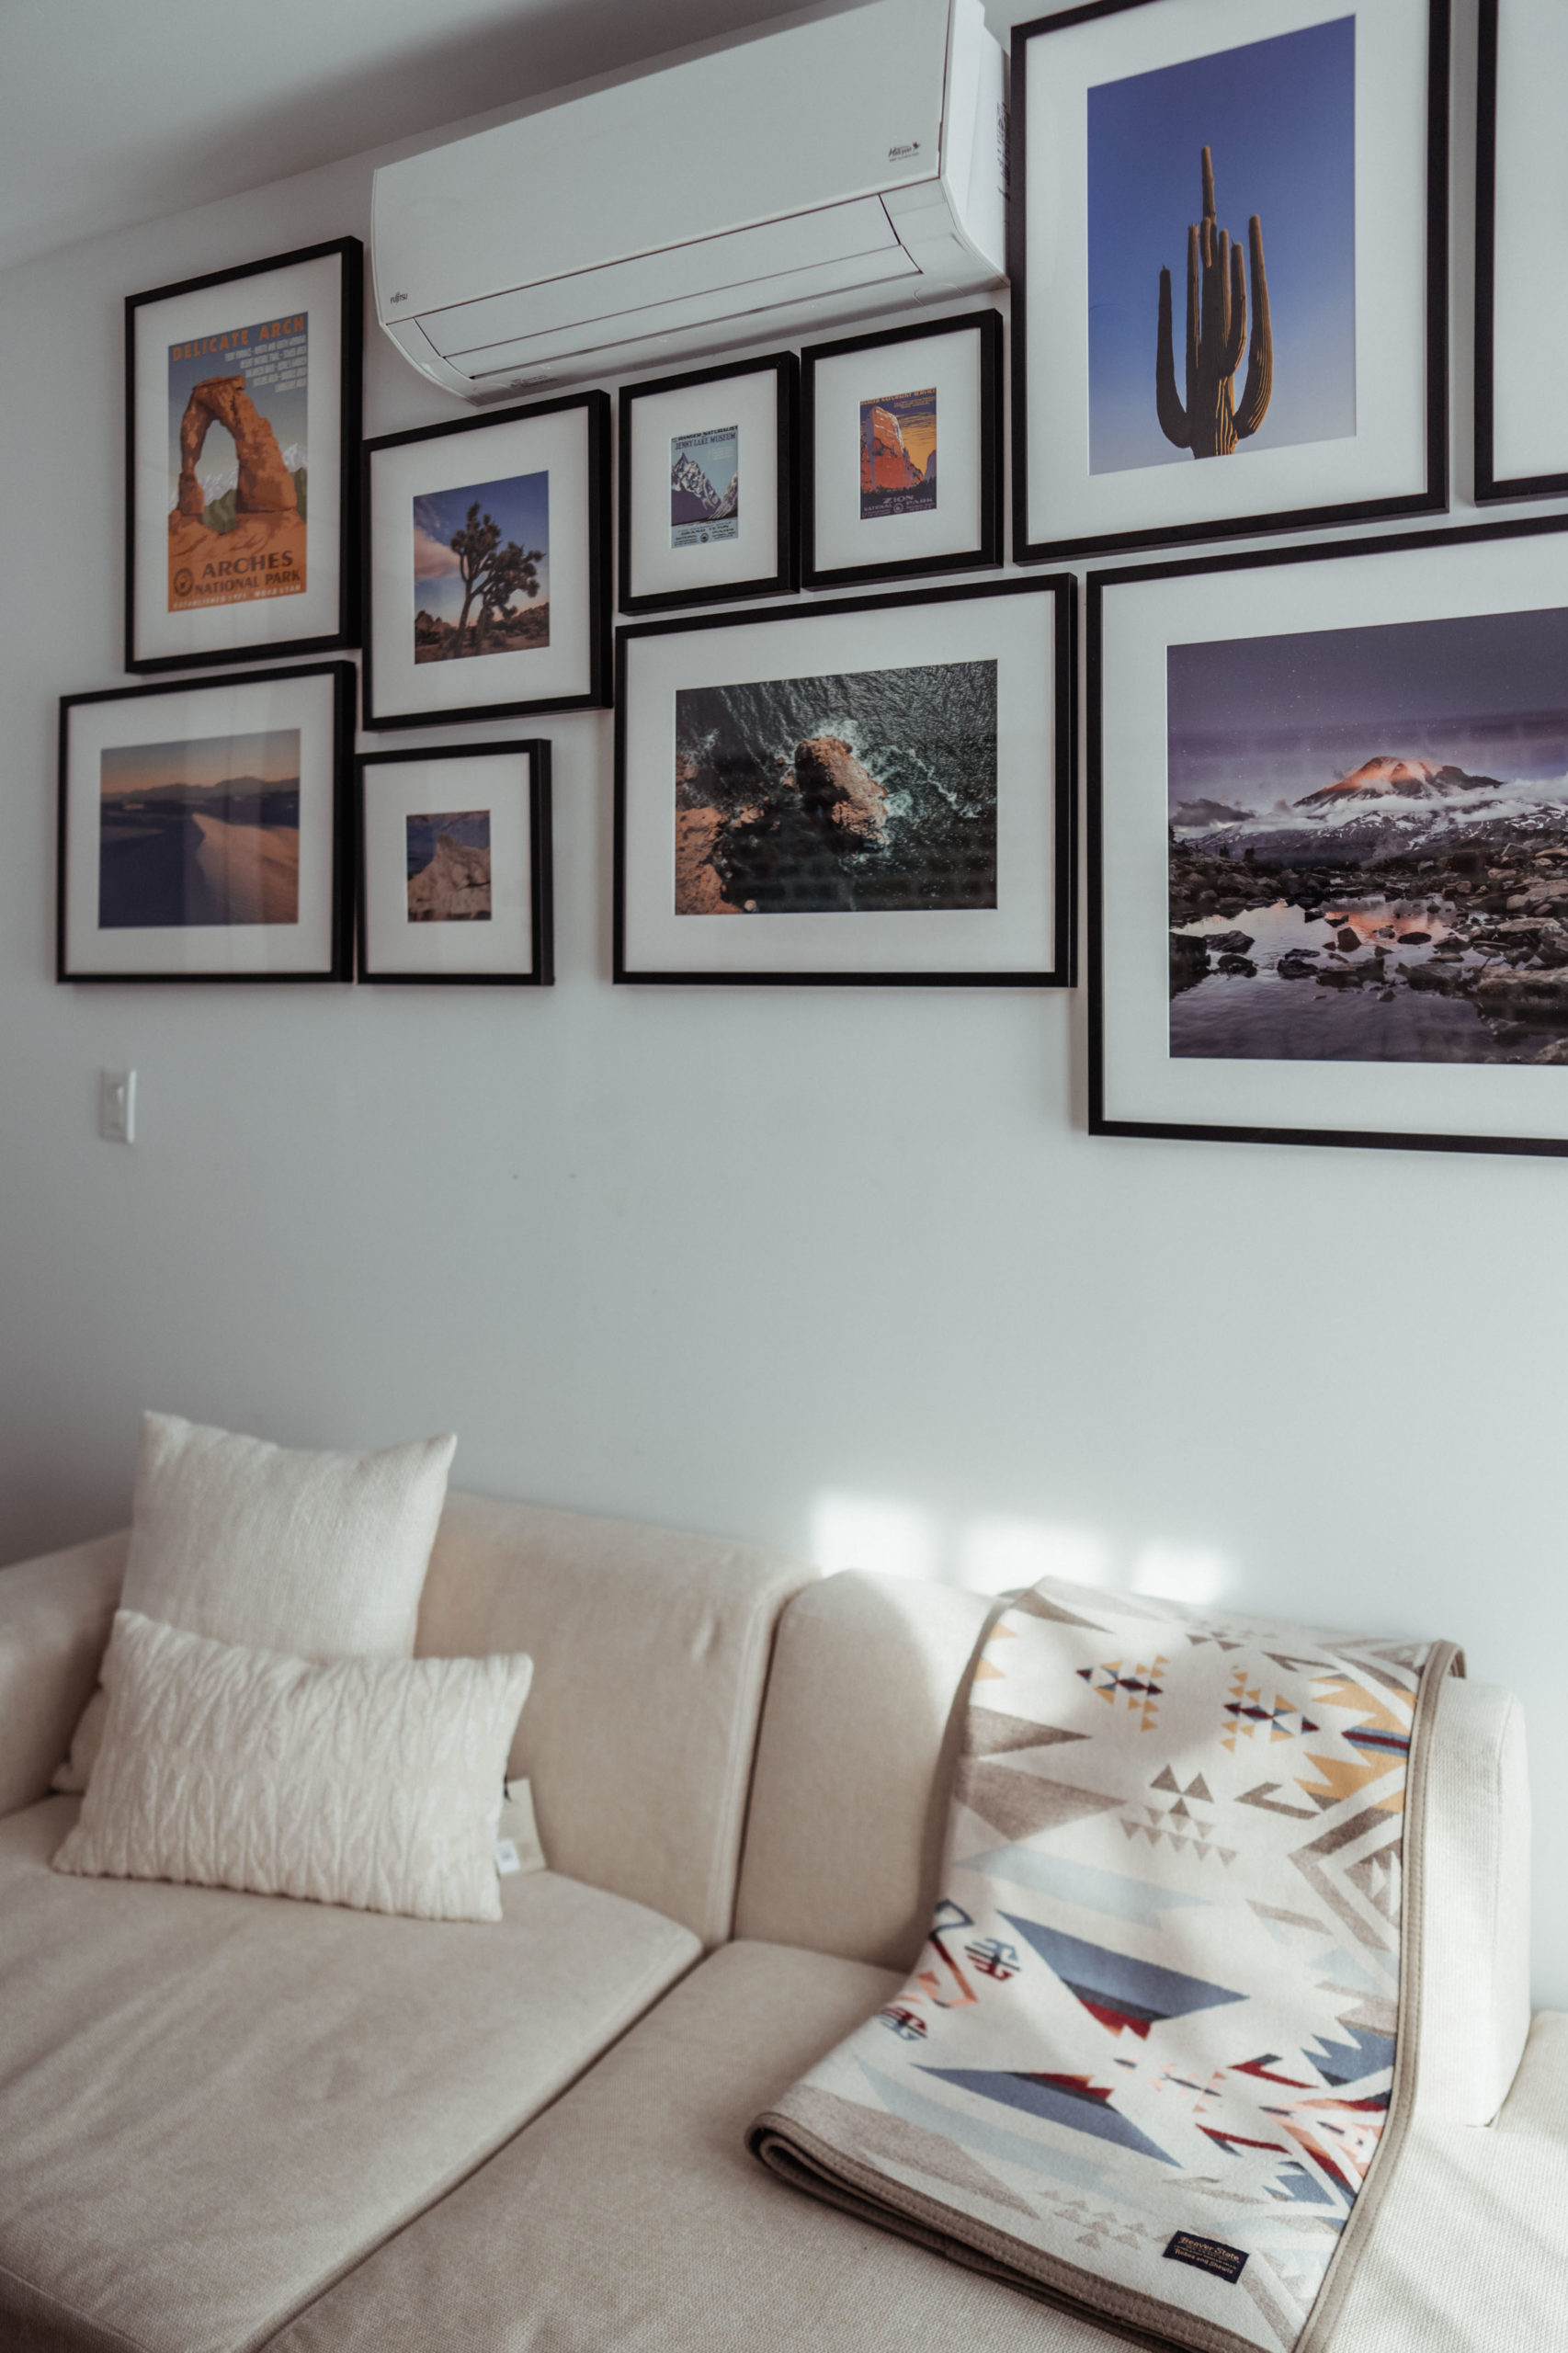
My living room wall got a makeover, and as you can guess from the title, it’s the big 11 frame National Park-themed Gallery Wall. Actually, this is a 12 frame project. The 12th frame is not pictured, and it’s currently hiding the electrical unit in the dining corner of my apartment.
In this post, I will share with you details about the whole project, my design process broken down into 10 steps, and the experience as to what it’s like working with the internet-famous framing company, Framebridge, and my honest review.
Disclaimer: This blog post is not sponsored. All 12 frames are gifted in exchange for photos, video footage, and an in-feed post on Instagram and pin on Pinterest which I have already submitted. Framebridge does not know about this review, and as always, all opinions are mine.

about Framebridge
Susan Tynan, the founder and CEO of Framebridge, had a terrible experience trying to frame some National Park posters. So she decided to start Framebridge with the hope of making framing services more accessible and affordable.
General Process
The entire process is done by Framebridge. They have a team of expert framers and designers, and their studio is located in Kentucky. It’s interesting because I thought they’d have a framing studio in each physical store that they have. Currently, there are 4 in New York City, and the rest is mostly in the east coast states.
Every frame is produced in the US and customized for each customer. Framebridge can frame about anything from photos, artwork, objects, and any memorable moments you have. All you need to do is pick out the frames, and they do the rest.
Pricing
Pricing is based on the size of your piece. It ranges from $39 and goes up to $250. The price includes secure packaging for shipping, photo printing with archival inks, the frame and mat, hanging hardware, and free shipping both ways.
More pricing information, HERE. And of course, personalization is extra.
In-store vs. Online:
I live in Brooklyn, a short train away from the Framebridge store in Williamsburg. First, I stopped by to ask questions about their process and saw the frames in person.
The store has a huge Gallery Wall with frames that enclose different objects, and that gets me excited for my own. I ended up dropping the prints and posters at the store since it’s faster than me shipping them myself.
Note that the process can be done entirely online at home. You can place an order that includes shipping materials and labels to be shipped to you, and you can drop things off at the post office.
FRAMEBRIDGE REVIEW:
1. Frame Ordering Process
PRO: I actually love the frame ordering process on the Framebridge website. Everything is automatic, and there are plenty of options in terms of sizing, mat, and frame styles to pick from. Note that you can also bring stuff into their store if you live near one, and their staff will help you pick a design and submit the order. Since I had a code (Code allows me to order 12 frames, and this is a part of my collaboration with Framebridge.), I decided to order the frames online at home.
After placing my frame order online and gathering all posters and prints, I dropped them off at the Williamsburg store. They put them away in a large binder and later ship everything to their Kentucky studio. Again, note that you can also choose the option to have packaging materials and shipping labels sent to your home.
CONS: They frame everything at their Kentucky studio which I personally think is inconvenient. I wish they had a framing studio at each physical store since that would have shortened the waiting time for many locals and minimized the risk of people’s valuable artwork and sentimental stuff getting lost during transit and shipping.
One of my frames arrived smaller than what I had anticipated, and it’s all my fault for making that mistake when ordering. Now I’d have to send it back in and wait even more. At least the bulk part is done, and I’m able to change out the Gallery Wall design as I go during the installment. Like why can’t I just get one frame fixed in a couple of days at their Williamsburg store since I live 20 minutes away?
3. Materials
Printing Paper and Inks. Framebridge uses premium lustre or enhanced matte paper using archival inks. This is already included in the pricing of the frame. I was not aware of this option, so I did pay my own money to have my prints done somewhere else. For this reason, I cannot give you a review of the print quality of their prints. However, their print sizes are limited, so I’m pretty sure you’d need to print your own if it’s out of their range.
Mouldings. Framebridge uses solid wood with premium finishes like hand-leafing, veneer, and gesso. I like all matching black thin frames to be like those in the museum, and the thinnest frames they offer are called Mercer Slim.
Mat board is used to separate the item being framed from the moulding and acrylic. Framebridge uses acid-free mat boards and offers a variety of mat colors. I’ve gone for the all-white mats. You can leave a note telling them any mat size you like because if not, they’d pick it for you. Float mounting and accent mat are extra.
Foam core is also acid-free. Framebridge does dry mount, float mount, hinge mount, and they can also sew original works or textiles to a mat board for mounting.
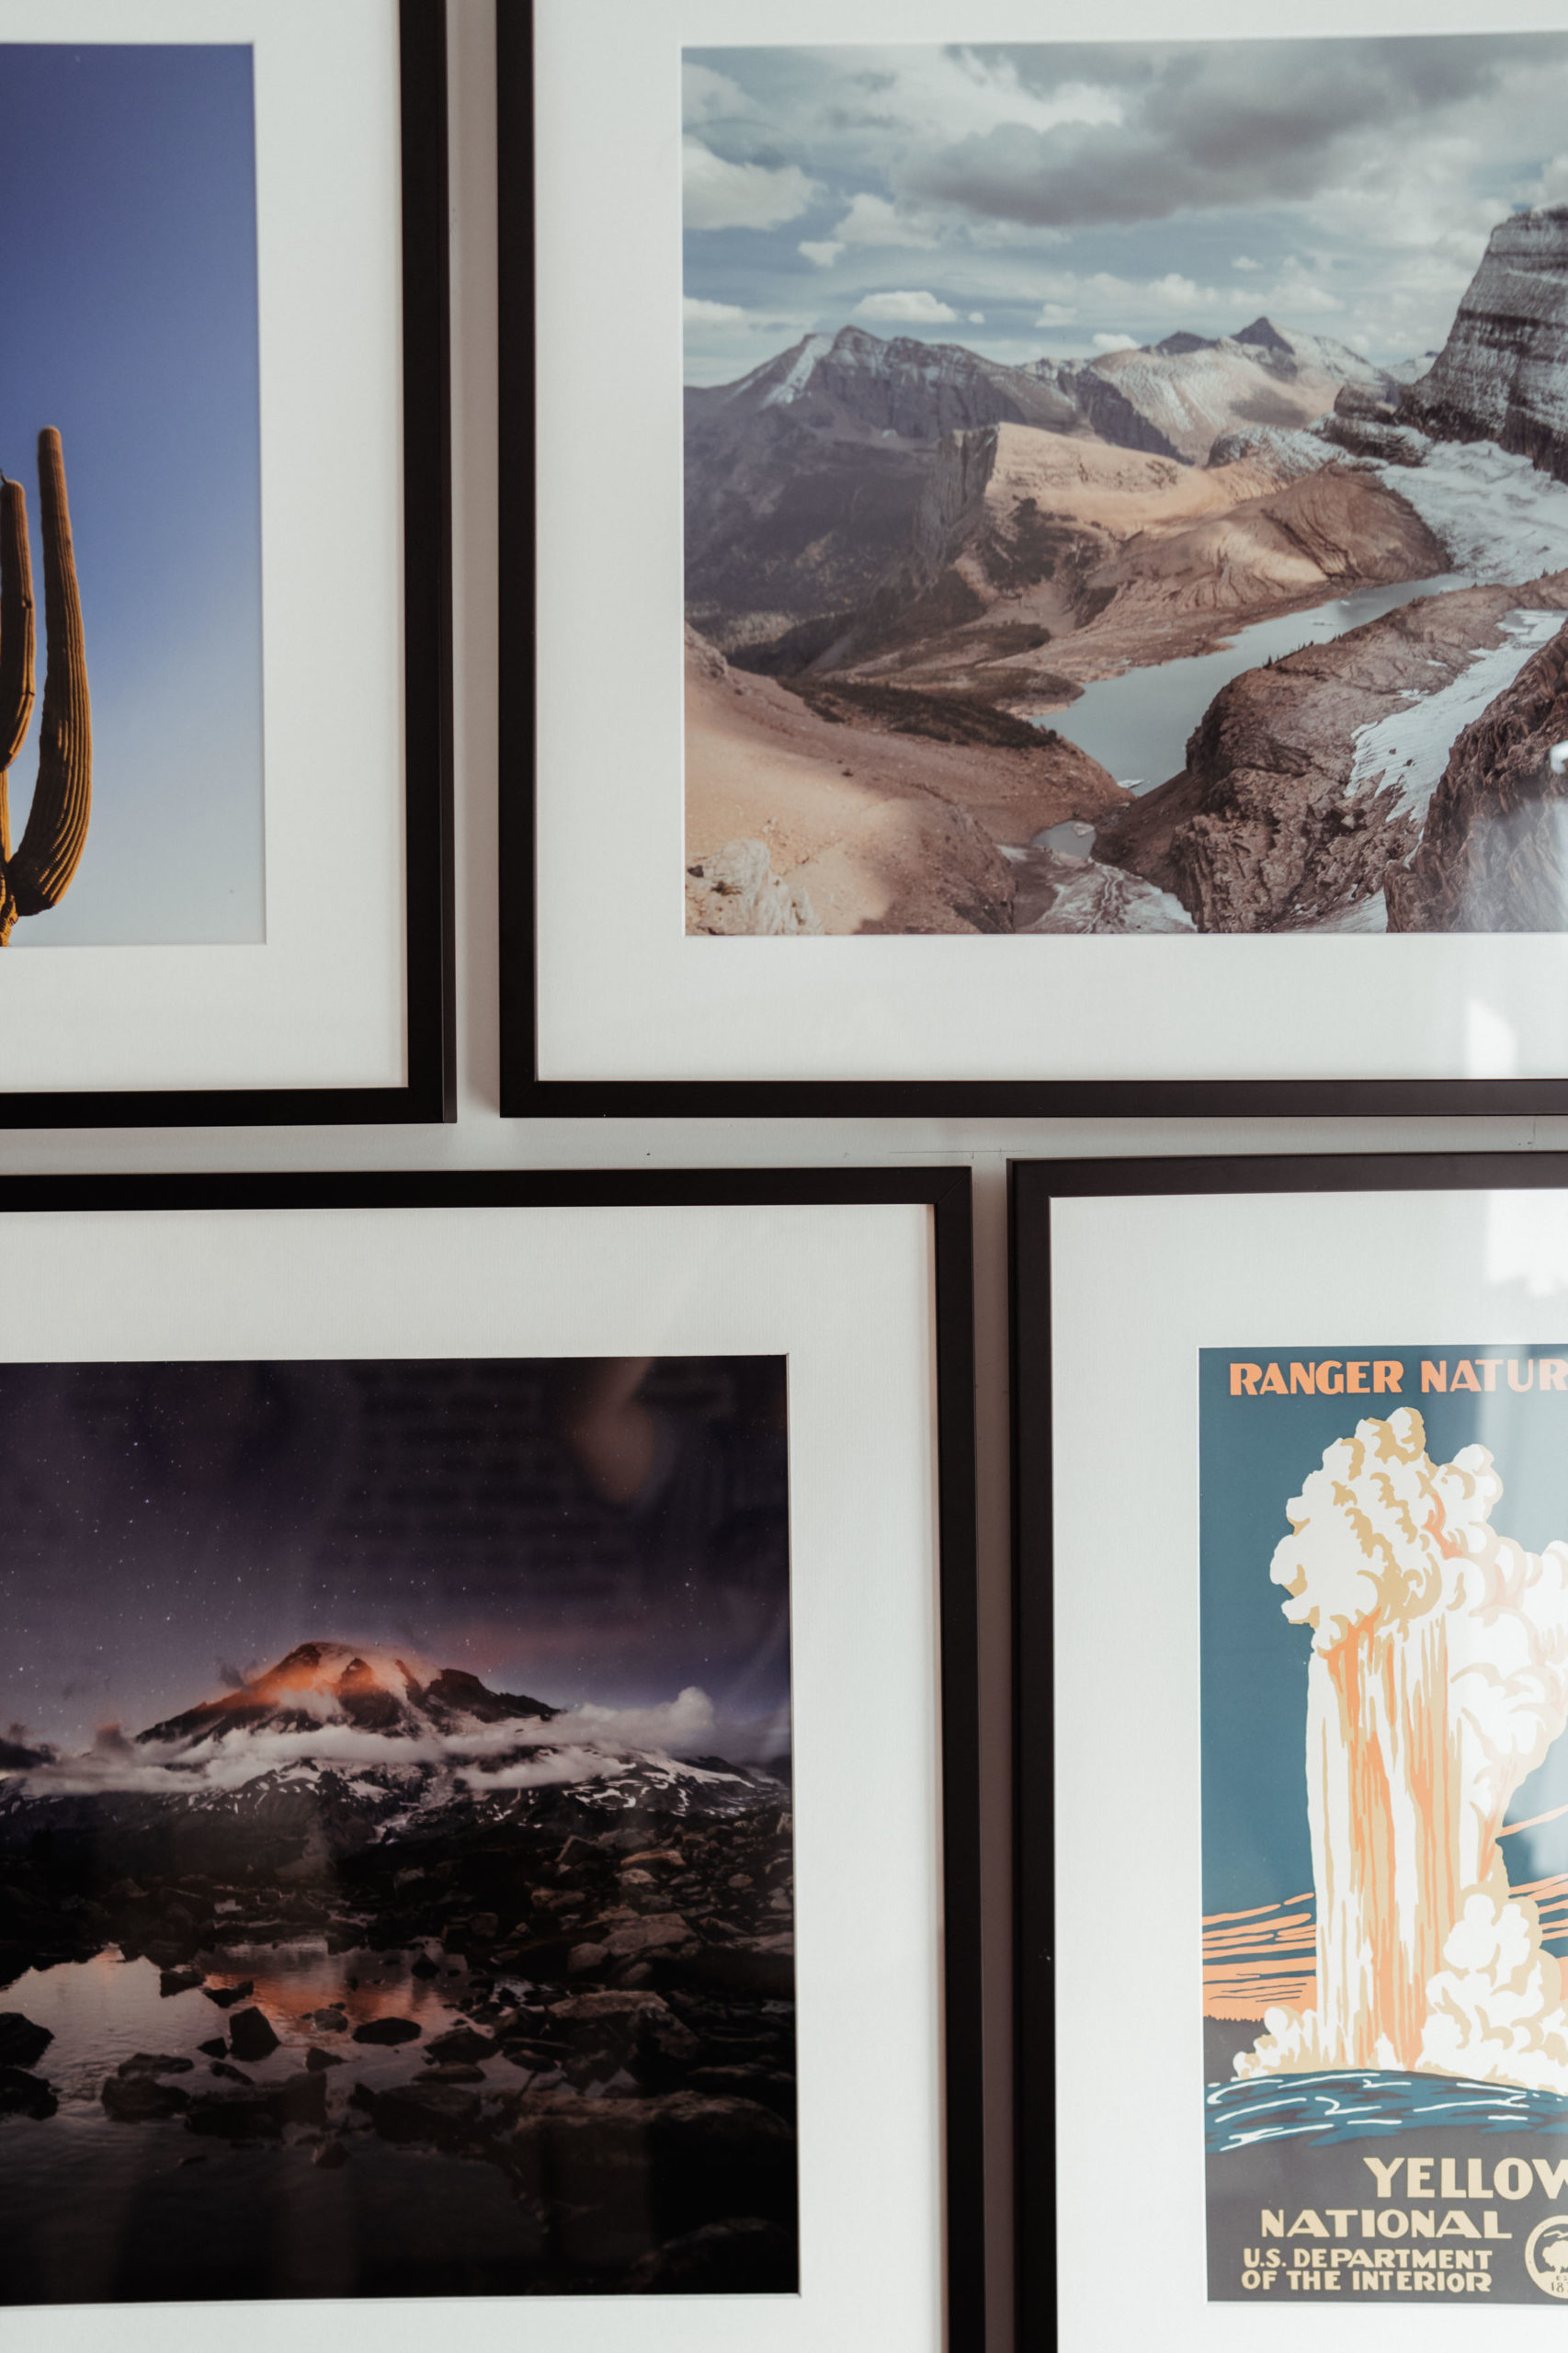
Acrylic. According to the information on the website, acrylic is more expensive than glass. Acrylic glazing offers UV protection, and it’s lighter and more durable for shipping. However, there is a reflection and glare if the sun hits it, and you can see them in some of my photos.
Hanging hardware. Each frame comes with a set of hanging hardware: sawtooth hangers, hanging wire, or corner brackets. I love that the corresponding nails are small which makes it easier to fix or hide any hole mistake. All you need are a hammer!
I also use a big ruler to measure where or how far in to put the nail.
My frames come in a mix of hanging wires and corner brackets. One complaint regarding the hanging wires on some of my large frames is that they’ve been installed a bit too low in the back. That makes the top portion of the frames angles out and does not sit close to the wall. I can fix it by shortening the wire myself, but that would need a tool to remove the metal knots. It’s not too big of a problem, so I just let them be.
4. QUALITY
All of my 12 frames come in 3 separate shipments, one before last year’s holiday, and two in January, and they’re all super securely wrapped with lots of bubble wraps and tied inside a big box. They have a bit of weight to them, not too heavy nor too light.
I love the Kraft paper seal in the back. It prevents dust and makes the piece looks so nice. However, that also means you can not change out the artwork yourself. I mean you can, but then you’d have to peel off the paper backing.
Three things I need to warn you beforehand. First, the paint on the moulding is thin and delicate. I bumped one frame on accident, and there’s already a dent in one corner. So just be careful when handling the frames. Second, the reflection and glare on the clear acrylic are there, and I do think that glass might have less of that problem. Lastly, the hanging wire issue I’ve mentioned above.
5. TIMING
Now, this is a huge issue if you’re in a rush to get these done. I started this project 3 months ago, and it’s now finally being done. It was partly because of the holiday break, and it also took me forever to decide on what prints to include in the Gallery Wall. I had to push back the project deadline twice. I wish they’d send an estimate of how long it takes for them to frame or notify me of the progress. I had to check the website a couple of times to see if the status was changed. Shipping was relatively fast.

DESIGN A GALLERY WALL – 10 STEPS
1. Decide on the theme of your Gallery Wall. If you’ve already had an idea of what exactly yours will look like, then skip to step 3. I find tons of inspiration on Pinterest and Instagram and sorta have a Mood Board/Inspiration Board in my head at the start. I want a National Park-themed, and it will include vintage posters which I bought from previous trips and nature prints that my partner took.
2. Sketch out the design layout (vertical or landscape). Decide on the number of frames and the orientation and keep in mind where the Gallery Wall will go. Use it to hide any blemishes and permanent things on the wall. Mine is 11 in all matching frames in a landscape that frames the AC unit in the living room.
3. Review steps and processes on the Framebridge website. If you live near a Framebridge store, I highly recommend coming in the store to ask questions and feel the materials that they use. They can also help you with the design process and ship out the pieces for you.
4. We use photoshop to design the Gallery Wall layout with the exact posters (grabbing the images online) and prints that I want on my Gallery Wall (photo below). For sizing, I actually play around with the frame ordering process on the Framebridge website because it will tell you the estimated frame size depending on how big your art is. Then I use tissue papers, cut them out at the exact sizes, and tape them on the wall. That helps a lot in the visualization.
5. Gather your arts and objects. Submit your digital prints on the Framebridge website. I use MPix to print the photos to the size that I want, but Framebridge also offers a bunch of sizes. I just didn’t know that at the time.
6. Place your frame order on the Framebridge website. There’s a note section in which you can put any special things you want them to adjust. Make sure to label your arts and objects and leave notes under each frame on the website.
7. Drop your arts and prints at a local Framebridge store if you live near one. Otherwise, you can order packaging materials and shipping labels to be shipped to you. Or just print out the prepaid labels, package everything and drop them off at a local post office.
8. Wait. You can check for updates on the website.
9. After the frames arrive, hang them. Make sure to measure the spacing of the hanging wire or corner brackets in the back carefully to know where the nail goes since each frame is different.
10. Remember to stand back and reevaluate as you go! Have fun!
PRINTING SERVICE I USED FOR MY CUSTOM-SIZED PRINTS
While writing this blog post, I regrettably realize that Framebridge also does image printing. I could have gotten this all done without the extra $100 spent and cut down on the waiting time.
SO UPLOAD YOUR PHOTOS ON THEIR DESIGN SERVICE PAGE HERE
Anyway, here’s what we ordered to be printed from MPIX. They’re based out in Pittsburg, KS, and print quality is pretty good. Shipping is fast, and everything comes carefully packaged. Don’t forget to use the first order discount. I highly recommend them!
|
10×10 on E-Surface |
Zabrinski-9×9 |
$4.99 |
|
|
12×18 on E-Surface |
White Sands-9×17 |
$14.99 |
|
|
12×18 on E-Surface |
Saguaro-12×18 |
$14.99 |
|
|
20×20 on E-Surface |
Rainier-18×18 |
$26.99 |
|
|
10×10 on E-Surface |
Joshua-6×6 |
$4.99 |
|
|
18×24 on E-Surface |
Glacier-24×18 |
$28.99 |
|
|
12×18 on E-Surface |
Channel-9×17 |
$14.99 |
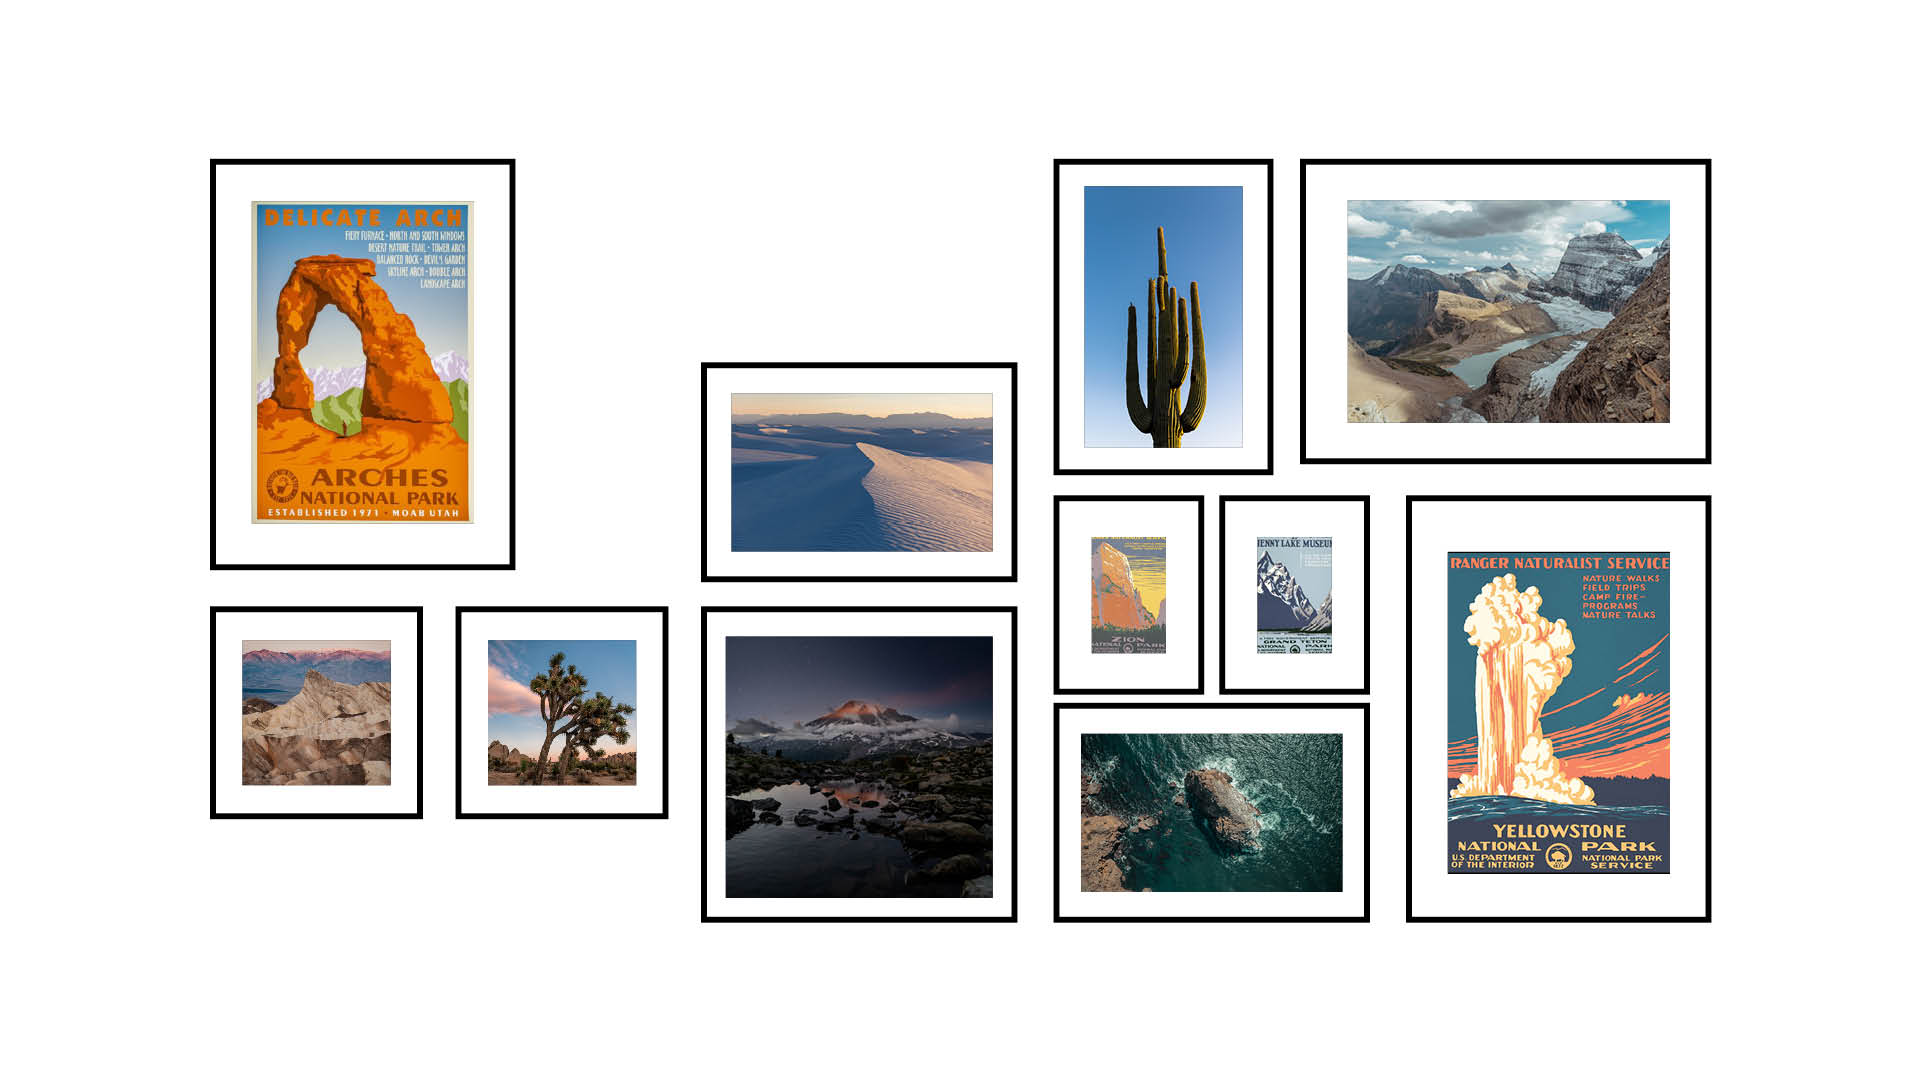
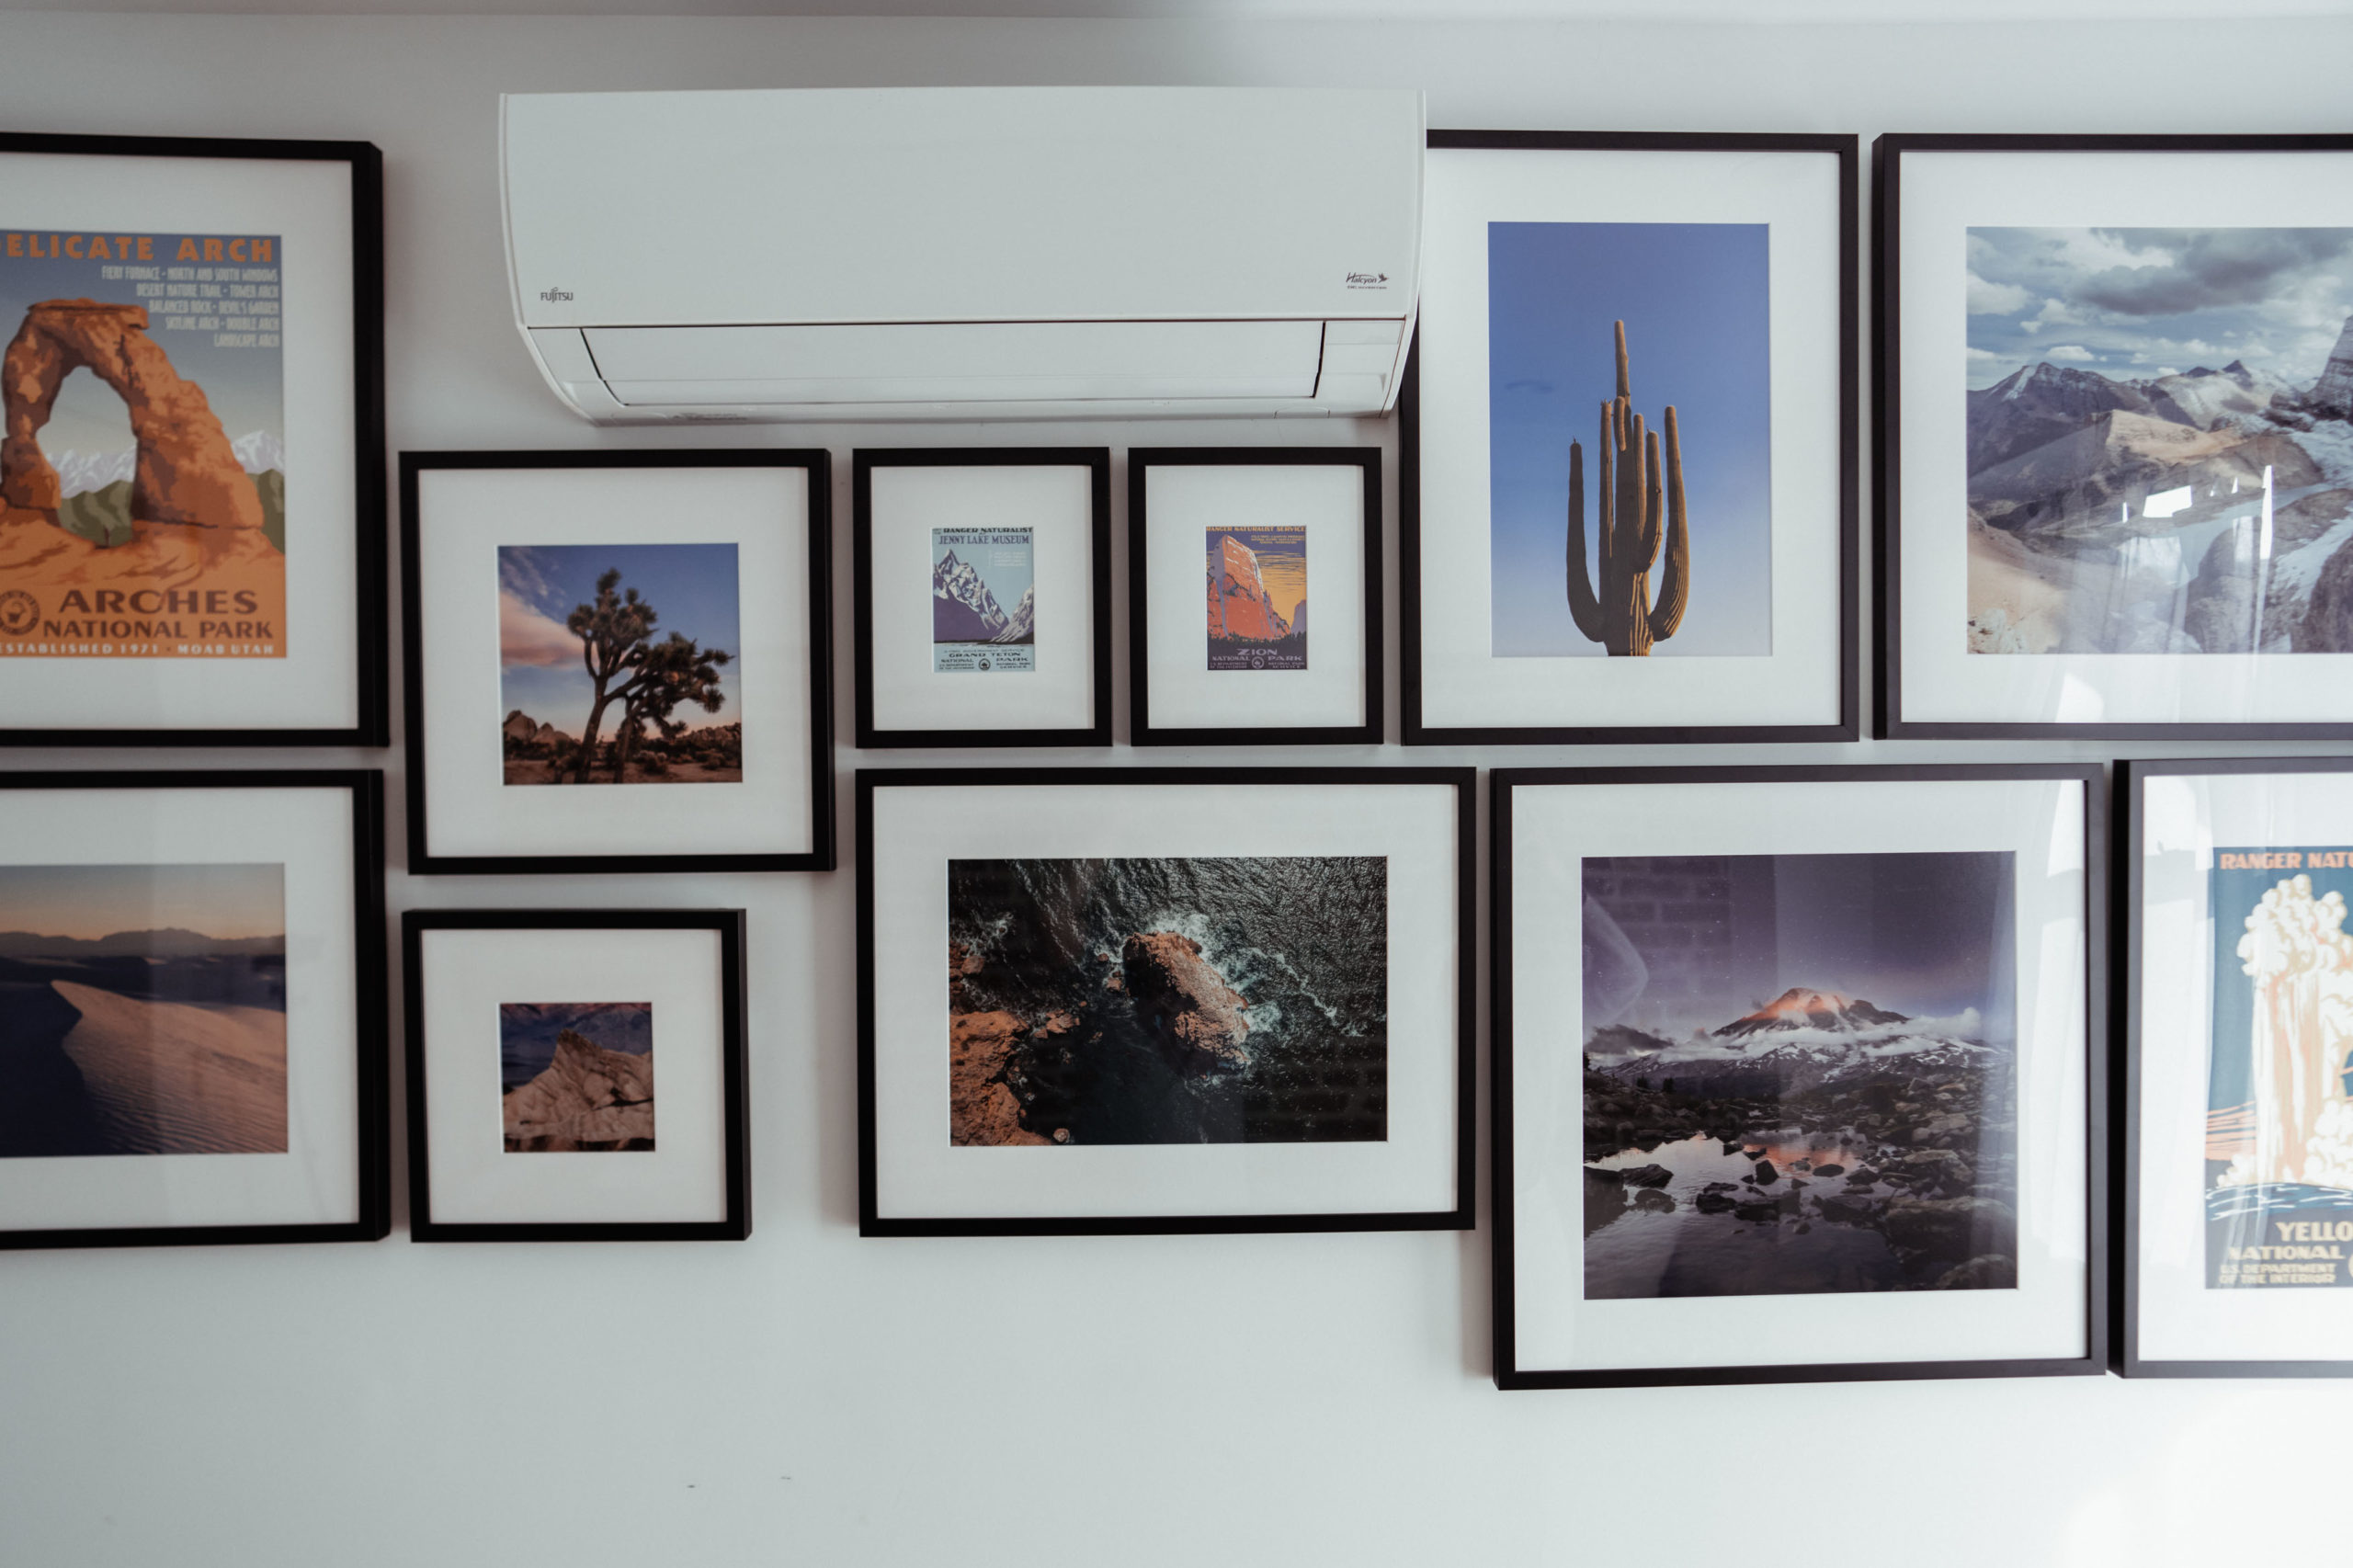
As you can tell the final Gallery Wall is slightly different, and it’s due to a framing order mistake. Death Valley frame should have had the same frame size as the Joshua Tree one but with a smaller mat size. However, the mat turns out to be too small, and it makes the landscape to be too squished. We purposely placed it below at the spot where it will be easily replaced by a larger-sized frame in the future. I’m currently waiting to hear back from Framebridge to see what they can do.



FINAL THOUGHTS
I am so pleased with my National Park-themed Gallery Wall, regardless of all the little mistakes and details that I mentioned above. It’s a big project which I am glad it’s finally finished. It’s filled with posters and images from my past travels with memories I will never forget. They distract the eys from the AC unit and draw the eys upward which in turn makes the ceiling appears higher than it actually is.
If you’re not in a hurry with your framing project, then Framebridge is a great company to go for. The frames are consistent and so beautiful in person. Personally, their pricing is slightly stiff, but it’s still not as expensive as many framing services out there. Their physical stores are modern and hip, and I love that they have a few stores in New York which makes it convenient if I want to drop by for questions.
GET 15% OFF WITH FRAMEBRIDGE HERE!
I had so much fun designing and putting together the Gallery Wall. If you’re bored and want to give your home a refresh, a Gallery Wall might be the perfect solution.

